DIY Manicure at Home: Step-by-Step Guide for Beginners
There’s something deeply satisfying about giving yourself a manicure that looks like you just walked out of a salon — no appointment, no wait time, and no cost beyond the products already sitting in your bathroom drawer. But if you’ve ever tried a DIY manicure only to end up with smudged polish, uneven edges, or a manicure that chips within two days, you know that doing it well takes more than just painting your nails and hoping for the best.
This guide walks through every step of a proper at-home manicure, from prepping your tools to applying a long-lasting top coat, along with troubleshooting tips for the most common beginner mistakes. Whether you’re doing this for the first time or trying to finally get consistent, salon-quality results, this guide has you covered from start to finish
Why a Proper Process Matters
It’s tempting to skip straight to polish, but a manicure is really a sequence of small steps that build on each other. Skipping nail prep, rushing the base coat, or ignoring cuticle care might save you five minutes today, but it usually costs you days of wear time and a less polished final look. Professional manicures last as long as they do because of the process, not just the products — and the same principle applies at home.
What You’ll Need: Building Your DIY Manicure Kit
Before starting, gather the following tools and products. You don’t need every single item to get a decent result, but having the core essentials makes a noticeable difference in both the process and the outcome.
Essential Tools
- Nail polish remover (acetone or non-acetone) and cotton pads or rounds
- Nail clippers for trimming length
- A glass or fine-grit nail file for shaping
- A buffer block for smoothing the nail surface
- A cuticle pusher (metal or wooden) for gently pushing back cuticles
- Cuticle nippers (optional, for trimming excess skin — use with caution)
- A small bowl of warm water for softening cuticles
- A nail brush for cleaning under the nail tips
Essential Products
- Cuticle oil or cream for hydration
- A base coat to protect nails and help polish adhere
- Your chosen nail polish color(s)
- A top coat to seal and add shine
- Hand lotion for finishing touches
Optional Extras
- Rubbing alcohol for a final nail wipe before polish
- Nail art tools like a dotting tool or thin brush, if you want to add designs
- A UV or LED lamp, if you’re using gel polish instead of regular lacquer
- Striping tape for clean lines or geometric designs
Having everything laid out and within reach before you start prevents the frustration of freshly polished nails getting smudged while you dig through a drawer mid-manicure.
Step 1: Remove Old Polish Completely
If you have polish on already, this is always the starting point. Soak a cotton pad with remover and press it against the nail for a few seconds before wiping, rather than scrubbing right away — this helps dissolve the polish more evenly and reduces streaking.
Acetone vs. Non-Acetone Remover
Acetone-based removers work faster and are more effective at breaking down stubborn or glittery polish, but they can be more drying to the nail and surrounding skin. Non-acetone removers are gentler and better suited for frequent use or for those with dry, brittle nails, though they may take a bit more effort on darker or long-wearing polishes.
Check for Leftover Residue
After removing the bulk of the polish, take a final swipe with a fresh cotton pad to catch any remaining color, especially near the cuticle line and edges where polish tends to linger. Any leftover pigment can interfere with how evenly your new polish applies.
Step 2: Shape Your Nails
With a clean nail surface, it’s time to shape. Use a glass or fine-grit file (avoid harsh metal files, which can cause splitting and peeling) and file in one direction rather than a back-and-forth sawing motion, which creates friction that weakens the nail edge.
Choosing a Shape
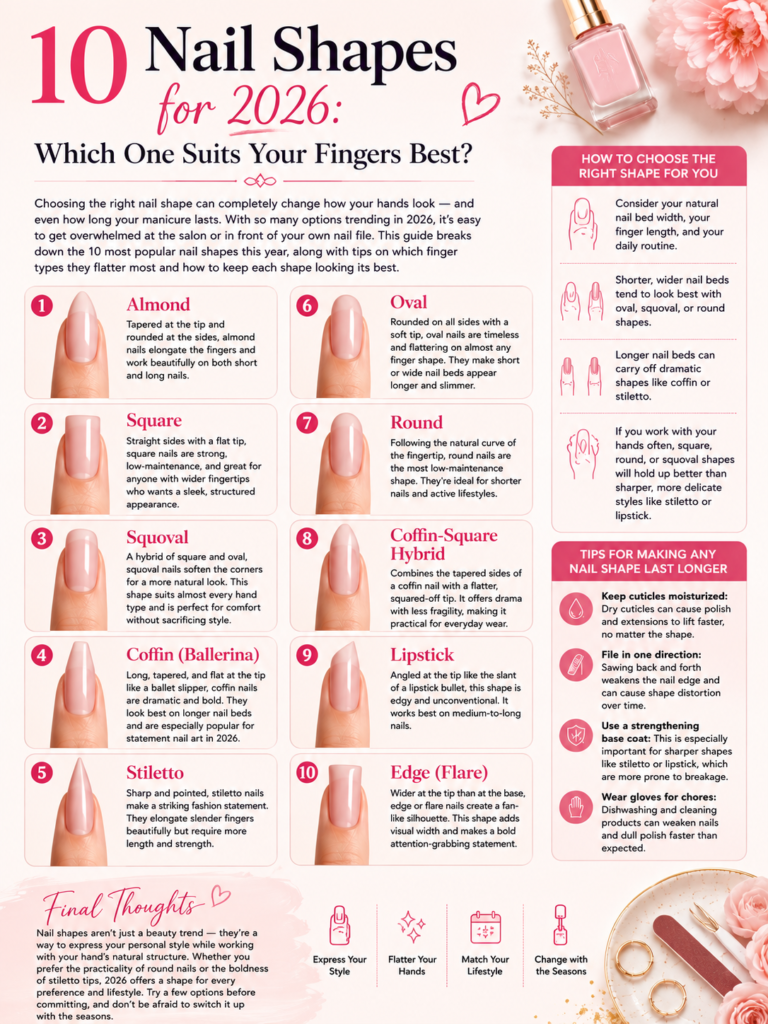
If you’re unsure what shape suits you best, squoval (a blend of square and oval) is one of the most universally flattering and low-maintenance options for beginners. Round and oval shapes are also easy to maintain and tend to be more forgiving if your filing isn’t perfectly even on your first few tries.
Keep Nails the Same Length
Before diving into shaping, use clippers to bring all nails to a similar length if needed, then use the file to refine and even out the shape afterward. Trying to shape nails that are dramatically different lengths first makes it much harder to achieve a uniform look across all ten nails.
File the Tip, Not Just the Sides
A common beginner mistake is only filing the sides of the nail without properly rounding or squaring the very tip. Take time to define the tip shape you want, checking from multiple angles to ensure both hands match.
Step 3: Soften and Care for Your Cuticles
Healthy cuticles are the unsung foundation of a good manicure. Neglecting this step is one of the most common reasons at-home manicures look less polished than professional ones, even when the polish application itself is decent.
Soak Your Fingertips
Soaking your fingertips in warm water for three to five minutes softens the cuticles, making them much easier to work with. You can add a few drops of cuticle oil or a gentle soap to the water for extra hydration during this step.
Gently Push Back Cuticles
Using a cuticle pusher, gently push the cuticle back from the nail plate in small, controlled motions, working from the base toward the edges. Avoid pressing too hard or digging into the skin, which can cause irritation or even minor injury.
Trim Only If Necessary
If you have excess hangnails or noticeably overgrown cuticle skin, cuticle nippers can be used carefully to trim only the loose, dead skin — never live cuticle tissue, as cutting too deep can lead to infection or irritation. When in doubt, it’s safer to simply push cuticles back and leave trimming to a professional.
Apply Cuticle Oil
Once cuticles are pushed back, apply a small amount of cuticle oil and gently massage it in. This step not only improves the appearance of your nail bed but also keeps the surrounding skin healthy between manicures.
Step 4: Buff and Prep the Nail Surface
After cuticle care, lightly buff the surface of each nail using a buffer block. This step removes natural oils and smooths any ridges, creating a better surface for polish to adhere to.
Don’t Over-Buff
A few gentle passes are enough — over-buffing thins the nail plate over time and can make nails more prone to peeling and weakness. If your nails already have a smooth, healthy surface, this step can be brief or even skipped for particularly sensitive or thin nails.
Wipe with Rubbing Alcohol
Before applying any polish, wipe each nail with a cotton pad dampened in rubbing alcohol. This removes any leftover oil, lotion, or dust from filing and buffing, all of which can prevent polish from adhering properly and lead to premature chipping.
Step 5: Apply a Base Coat
Never skip the base coat — it’s one of the most important steps for both nail protection and polish longevity. A good base coat creates a smooth surface for color application, helps prevent staining from pigmented polishes (especially reds and darker shades), and gives the topcoat something to properly bond to.
Apply Thin and Even
Use one thin, even coat of base coat, brushing from the base of the nail to the tip. Allow it to dry for a minute or two before moving on to color — applying color over a still-wet base coat can cause streaking or bubbling.
Choose the Right Base for Your Nail Type
If you have weak or peeling nails, consider a strengthening base coat formulated with ingredients like keratin or calcium. For sensitive nails prone to staining, a base coat with extra pigment-blocking properties can help keep nails looking healthy underneath colored polish.
Step 6: Apply Your Color
This is the step most people associate with a “manicure,” but getting a clean, even color application takes a bit of technique.
The Three-Stroke Method
Many professional manicurists use a simple three-stroke technique: one stroke down the center of the nail, followed by one stroke on each side, slightly overlapping the center stroke. This method covers the nail evenly without requiring excessive back-and-forth brushing, which can create streaks or drag lines.
Apply Two Thin Coats
Rather than trying to achieve full opacity in one thick coat, apply two thin coats, letting the first dry for a couple of minutes before applying the second. Thin coats dry more evenly, reduce the risk of smudging, and generally result in a smoother, more professional-looking finish.
Clean Up the Edges
If polish gets onto the skin around your nail, use a small angled brush dipped in remover, or a cotton swab, to clean up the edges once the polish has dried slightly. Doing this cleanup while the polish is still very wet can smear it, so a light touch and a bit of patience go a long way here.
Let Layers Dry Between Coats
Patience is key during this step. Applying a second coat too soon over a still-wet first coat is one of the most common causes of a manicure that looks lumpy, streaky, or takes forever to fully dry.
Step 7: Seal With a Top Coat
The top coat is what gives your manicure its glossy shine and, more importantly, its durability. A good top coat protects the color underneath from chipping, scratching, and fading.
Cap the Free Edge
Just like with color, make sure to sweep the top coat over the very tip of the nail (the free edge) to seal the edges completely. This single step significantly reduces the chances of your manicure chipping within the first few days, since it prevents water and daily friction from getting underneath the polish layer.
Choose the Right Finish
Glossy top coats tend to be more durable and resistant to visible scratching than matte finishes, though matte top coats offer a trendy, modern look if that’s the aesthetic you’re going for. Quick-dry top coat formulas can also be a good option for beginners who want to speed up the overall drying process.
Step 8: Let Your Nails Dry Properly
This is the step most people rush, and it’s often the reason a perfectly good manicure ends up with smudges or dents within the first hour.
Give It Real Time
Even “quick-dry” polishes typically need a full 15 to 20 minutes before nails are truly hardened enough to resist dents from everyday touch. The surface may feel dry to the touch much sooner, but the layers underneath can still be soft for a while longer.
Use Cold Water or Drying Drops
Running freshly polished nails under a stream of cold water for a minute or two after they feel touch-dry can help speed up the hardening process. Specialized quick-dry drops or sprays, which contain fast-evaporating oils, can also be applied over finished nails to cut down on total drying time.
Avoid Common Post-Polish Mistakes
Try to avoid activities that require fine motor skills — typing, doing dishes, or digging through a bag — for at least 30 minutes after finishing your manicure. Even nails that feel dry on the surface can still dent or smudge under pressure during this window.
Step 9: Finish With Cuticle Oil and Hand Lotion
Once your polish is fully dry, apply a final layer of cuticle oil around the base of each nail and massage a small amount of hand lotion into your hands, avoiding the nail surface itself if the polish is still very fresh.
This finishing step not only makes your hands look and feel more polished overall but also supports the health of the skin around your nails, which helps your manicure look neater for longer as cuticles stay hydrated and less prone to peeling or catching on fabric.
Common Beginner Mistakes and How to Fix Them
Even with a solid process, a few common missteps can undermine your results. Here’s how to recognize and correct them.
Streaky Polish
This is usually caused by applying color too thin on the first coat, using an old or thickened polish, or not allowing enough dry time between coats. Try shaking your polish gently (not vigorously, which creates bubbles) before use, and consider adding a few drops of polish thinner if your bottle has become gloopy over time.
Polish on the Skin
A slightly unsteady hand is completely normal, especially for beginners. Keep a small angled brush and remover nearby to clean up edges after the polish has set for a minute or two, rather than trying to wipe wet polish immediately, which tends to smear rather than clean.
Bubbles in the Polish
Bubbles usually form from shaking the polish bottle too vigorously or applying coats too thickly. Roll the bottle between your palms instead of shaking it, and stick to thin, even coats to minimize this issue.
Chipping Within a Day or Two
This is almost always tied to skipped or rushed base coat application, not capping the free edge with top coat, or not allowing nails to fully dry before resuming normal activities. Revisit each of these steps if chipping keeps happening earlier than expected.
Uneven Nail Shapes
If your nail shapes don’t quite match across both hands, it often comes down to filing in a back-and-forth motion rather than single, consistent strokes in one direction. Take your time on this step, and don’t be afraid to periodically hold your hand at arm’s length to check symmetry as you go.
Gel Polish at Home: What’s Different
If you want longer-lasting results and have access to a UV or LED lamp, gel polish can be done at home with a similar process, but a few extra steps are involved.
Extra Prep Is Even More Important
Because gel relies on a chemical bond rather than simply air-drying, thorough dehydrating and priming of the nail before application matters even more than with regular polish. Skipping this step is the most common reason at-home gel manicures don’t last as long as expected.
Curing Between Each Layer
Each layer — base coat, color, and top coat — needs to be cured under your lamp for the time specified on the product packaging, typically 30 to 60 seconds. Skipping or shortening this step leads to soft, under-cured gel that’s prone to peeling within days.
Removing the Tacky Layer
After your final cure, gel top coats often leave a sticky residue called the inhibition layer. Wipe this away with a lint-free pad and rubbing alcohol to reveal the polish’s true shine underneath.
Removal Requires More Patience
Unlike regular polish, gel can’t simply be wiped off with remover. It requires soaking in acetone for 10 to 15 minutes, using foil-wrapped cotton pads or a soaking bowl, before gently pushing off the softened gel. Never peel or pick at gel polish, as this can seriously damage the natural nail underneath.
Building a Manicure Routine That Works for You
Once you’re comfortable with the basic steps, it helps to think about how often you’ll realistically want to redo your manicure and what that means for product choice and time investment.
For Weekly Touch-Ups
If you enjoy changing your polish color frequently, regular lacquer is the easiest option since it requires no special equipment and comes off with basic remover. This is a great choice for beginners who are still experimenting with colors, techniques, and shapes.
For Longer-Lasting Results
If you’d rather do a manicure every two to three weeks instead of every few days, investing in a gel polish system with a UV or LED lamp may be worth the upfront cost, especially once you’re comfortable with the extra steps involved.
Keeping a Simple Maintenance Kit
Regardless of which system you choose, keeping cuticle oil, a buffer, and a quality top coat on hand for touch-ups between full manicures can meaningfully extend how polished your nails look day to day, even without redoing the entire process each time.
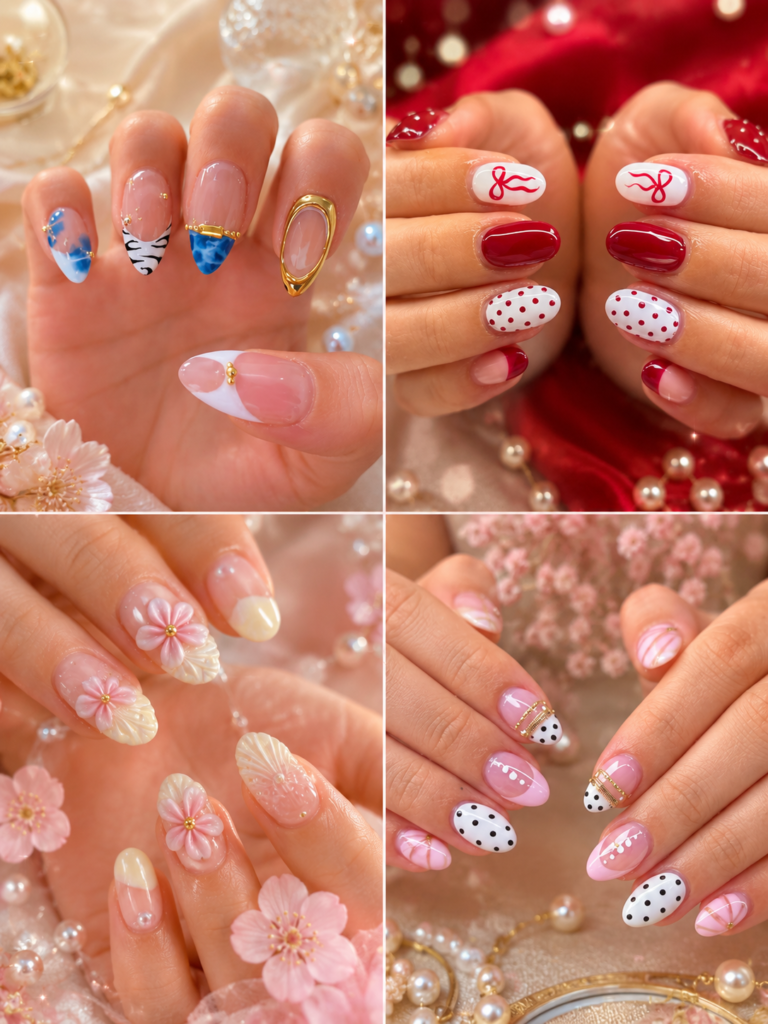
Nail Art Ideas for Beginners
Once you’ve mastered the basic manicure process, adding simple nail art is a natural next step. A few beginner-friendly techniques include:
- Accent nails: Painting just one or two nails a different color or pattern is an easy way to experiment without committing to a full design across all ten nails.
- Striping tape: Using thin adhesive tape strips before applying polish allows you to create clean geometric lines or negative space designs without needing a steady freehand brush.
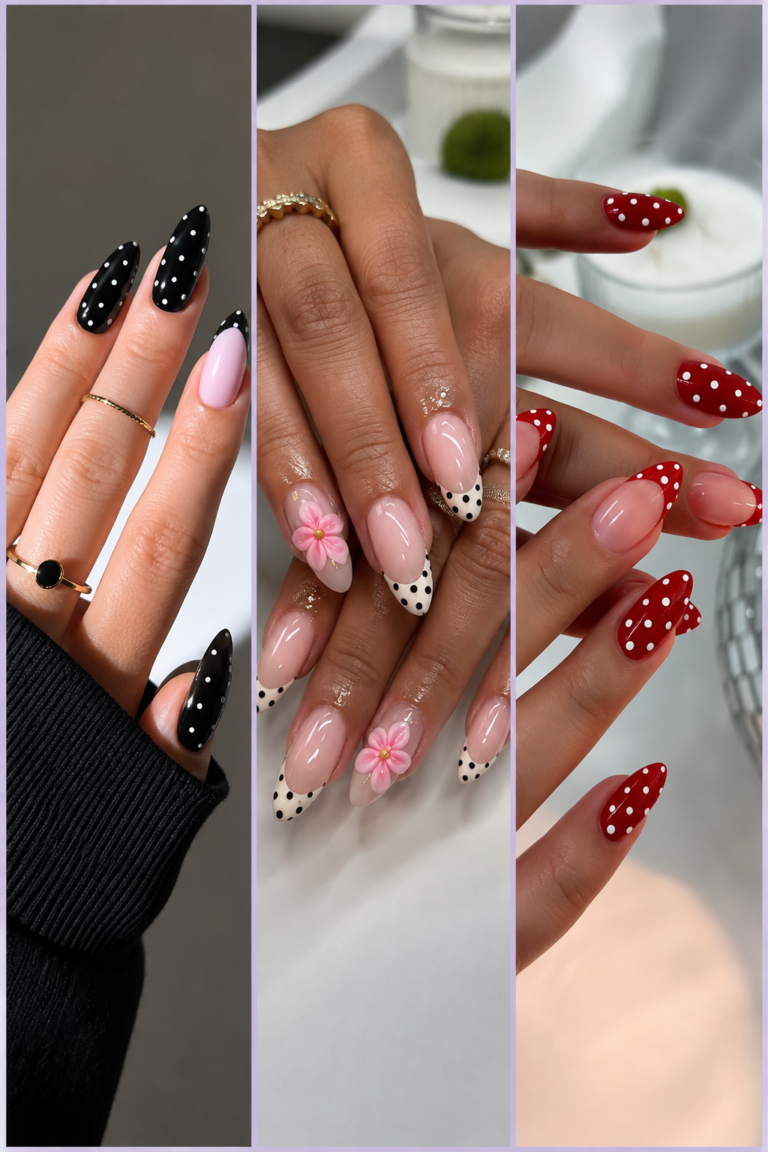
- Dotting tools: A simple dotting tool (or even the rounded end of a bobby pin) can create polka dots, simple flowers, or accent details with minimal skill required.
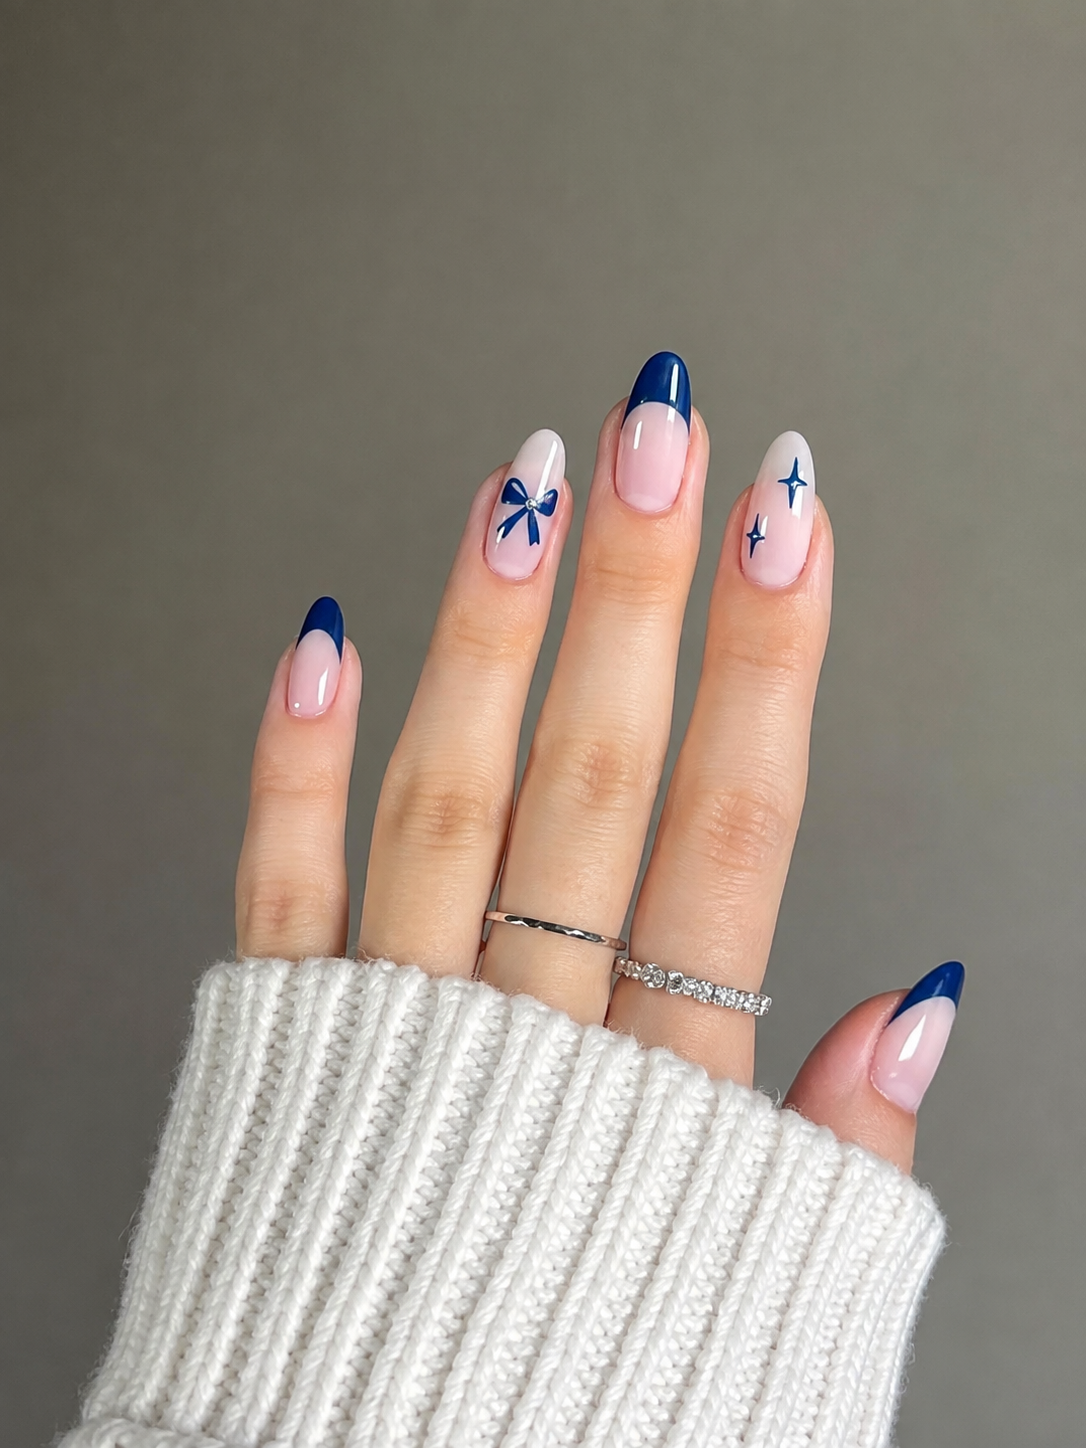
- French tips with a guide: French tip stickers or guides make it much easier to achieve a clean, straight line at the tip of the nail compared to freehanding it.
Starting with simple techniques builds confidence and hand control before attempting more advanced freehand nail art down the line.
How to Make Your DIY Manicure Last Longer
A few small habits after your manicure is complete can make a noticeable difference in how long it holds up.
- Wear gloves for chores involving water or cleaning products, which can weaken polish and cause premature chipping.
- Reapply top coat every few days to refresh shine and add an extra protective layer against daily wear.
- Avoid using your nails as tools for tasks like opening packages or scraping labels, which is one of the most common causes of chips and cracks.
- Keep cuticles moisturized with daily oil application, since dry, cracking cuticles can pull at the edges of your polish over time.
- Touch up small chips immediately rather than waiting, since a small chip left alone often spreads further with daily use.
Choosing the Right Products for Your Nail Type
Not all nails behave the same way, and picking products suited to your specific nail type can make a noticeable difference in how your DIY manicure looks and lasts.
For Weak or Brittle Nails
If your nails tend to peel, split, or break easily, look for a base coat with strengthening ingredients like keratin, calcium, or biotin. Avoid overly harsh acetone removers when possible, opting instead for a gentler non-acetone formula, and be extra cautious not to over-file or over-buff, which can worsen thinness over time.
For Oily Nail Beds
Some people naturally produce more oil on their nail plate, which can cause polish to slide or fail to adhere properly. If this sounds familiar, spend a little extra time on the rubbing alcohol wipe-down step before applying base coat, and consider a dedicated nail dehydrator product if you continue to notice adhesion issues.
For Dry or Ridged Nails
Visible ridges running vertically down the nail are common and usually harmless, but they can show through polish more visibly on certain finishes. A ridge-filling base coat can help smooth the surface for a more even color application, and regular cuticle oil use can help minimize the appearance of dryness-related texture over time.
For Stained or Discolored Nails
If you frequently wear dark or highly pigmented polish, staining on the natural nail can build up over time. Using a high-quality, pigment-blocking base coat every single time — even for lighter shades — helps prevent this discoloration from becoming noticeable.
Setting Up Your DIY Manicure Station
Where and how you set up your workspace has a bigger impact on your results than most beginners expect.
Good Lighting Is Essential
Natural daylight or a bright, white LED light source makes it much easier to spot missed spots, uneven color, or smudges before they dry. Dim or yellow-toned lighting can make polish look more even than it actually is, only for flaws to become obvious later in different lighting.
A Stable, Comfortable Surface
Work at a table or desk at a comfortable height, rather than balancing on your lap, to keep your hands steady and reduce smudging from awkward angles. A small towel or paper towel underneath your work area also helps catch drips and makes cleanup easier.
Keep Everything Within Reach
Arrange your tools and products in the order you’ll use them — remover, clippers, file, buffer, cuticle tools, base coat, color, top coat — so you’re not reaching across wet nails mid-manicure. This small organizational step prevents a surprising number of accidental smudges.
Consider Your Dominant Hand
Painting your non-dominant hand is often trickier since you’re using your less coordinated hand to hold the brush. Many people find it easier to do their dominant hand last, once they’ve built a bit of rhythm and confidence from painting the first hand.
Time Management: How Long Should a DIY Manicure Take?
For beginners, it’s worth setting realistic expectations about timing so you don’t feel rushed or discouraged.
A Realistic Timeline
A full, careful manicure — including polish removal, shaping, cuticle care, and two coats of color plus top coat — typically takes 45 minutes to an hour for beginners, including drying time between steps. With practice, this can often be trimmed down to 30 to 40 minutes as your technique becomes more efficient.
Don’t Rush the Early Steps
It’s tempting to rush through prep steps to get to the “fun part” of applying color, but skimping on shaping, cuticle care, or the alcohol wipe-down is one of the most common reasons results don’t match salon quality, regardless of how carefully the polish itself is applied.
Plan Around Drying Time
Because each layer needs adequate drying time, plan your manicure around a period when you won’t need to use your hands for anything demanding for at least an hour afterward. Trying to multitask immediately after finishing is one of the most common causes of smudged, dented, or fingerprint-marked nails.
Troubleshooting Specific Polish Issues
Beyond the general mistakes covered earlier, a few specific issues tend to trip up beginners repeatedly.
Polish Pooling at the Cuticle Line
If polish tends to pool or thicken right at the base of the nail near the cuticle, you may be applying too much product on your brush or starting your stroke too close to the cuticle itself. Start your brush stroke a hair’s width away from the cuticle line and let the polish naturally flow into place rather than pushing it there directly.
Visible Brush Strokes After Drying
This is often caused by polish that’s slightly too thick or old, which doesn’t self-level as smoothly as fresher formulas. Adding a few drops of nail polish thinner (not remover) to an older bottle can restore its consistency and reduce visible brush strokes.
Color Looking Different Than Expected
Certain shades, particularly sheer or jelly-finish polishes, can look noticeably different depending on how many coats are applied and the natural undertone of your nail bed. If a color isn’t building up the way you expected, try an extra thin coat rather than one thick one, which usually gives more predictable, even results.
Top Coat Causing Smearing
If your top coat seems to smear or drag the color underneath, the color coat likely wasn’t fully dry before the top coat was applied. Always give color a minute or two to set before sealing with top coat, even if it looks dry on the surface.
Sustainable and Budget-Friendly DIY Manicure Habits
For those doing manicures regularly at home, a few habits can help you get more value and less waste out of your routine.
Store Polish Properly
Keep nail polish bottles in a cool, dark place away from direct sunlight and temperature fluctuations, which can cause the formula to thicken or separate more quickly. Storing bottles upright, rather than on their side, also helps prevent pigment from settling unevenly.
Extend the Life of Your Tools
Clean buffer blocks and files with a small brush to remove buildup, and replace them once they no longer feel effective, since worn-out tools can lead to uneven filing and buffing results. Metal tools like cuticle pushers and nippers can be wiped with rubbing alcohol after each use to keep them sanitized and functioning well.
Buy Quality Where It Matters Most
While you don’t need to spend a fortune on every product, investing a little more in your base coat, top coat, and file tends to make the biggest difference in overall results, since these products directly affect adhesion, durability, and shape quality — arguably more than the color polish itself.
Final Thoughts
A great DIY manicure isn’t about expensive tools or advanced technique — it’s about following a consistent process and giving each step the time it actually needs. From proper nail prep and cuticle care to thin, even coats and a well-sealed top coat, each stage builds toward a manicure that not only looks polished but actually lasts.
With a little practice, patience, and the right basic toolkit, you can achieve results at home that rival a professional salon visit, all while saving time and money in the process. Start with the fundamentals in this guide, and don’t be discouraged if your first few attempts aren’t perfect — like any skill, a great DIY manicure gets easier and more consistent the more you practice it.